
·
Creating a document's template
How to create a customised document template based on a use case with an examination certificate

How to create one's customised document template ?
Let's have a look at a use case based on a genuine document (the document used here is an examination certificate)
- Identify the key items requiered on the template
- Identify those key items on the genuine document so as to insert dynamic fields
Let's get into the details
The writer of the examination certificate wants to be able to create his document via paxpar.tech
Avantages
Here are a number of advantages when generating your document via the platform, rather than using a common text editor.
One can :
- Resubmit the generated document to quickly and efficiently edit it again
- Deal with a document no matter how overloaded it may be with metadata, photos or even PDFs
- Benefit from the automatic completion of the form, simply by dropping in a document which has formerly been generated via the platform
The desired template
We aim at designing a template that is as close as possible to the genuine document's template.
Procedure
To create our own template of the document, we need to use a word processor, such as Microsoft Word or LibreOffice. In our example, we'll use LibreOffice.
Dynamic fields
First of all, we need to dissect the genuine document, and isolate the useful information to put in dynamic fields in our template.
After studying the genuine document (hereafter an examination certificate), we end up with :
| Key information from the document | Name / key variable |
|---|---|
| the learner's first and last name | nom |
| the learner's date of birth | date_naissance |
| the learner's address | adresse |
| the examination date | date_examen |
| the examination subject | matiere |
| the final score | note |
Inserting a dynamic field using LibreOffice
So far, we've talked a lot about dynamic fields, but two questions remain: What are they used for? And how do we insert them into the document?
These ‘dynamic’ fields are like ‘tags’: they are used to indicate to our platforme paxpar that a specific field can be filled in with one of the craftform fields.
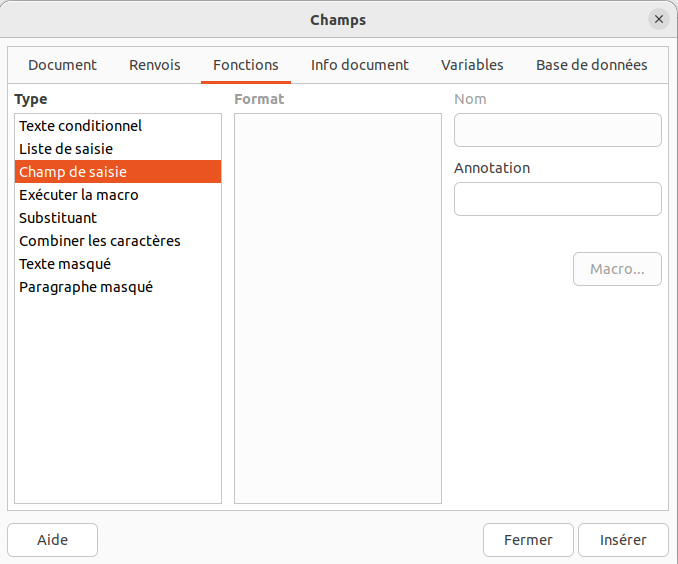
To insert them, simply go to: Insert (Toolbar) > Field > More fields...
Alternatively, you can press ctrl (control) and F2 (on Windows) at the same time.
A pop-up window appears with various tabs, so make sure you select the one called Functions.
Under the tabs you have 3 columns: Type, Format and Name
In the ‘Type’ column, go to Input field.

Click on Insert
A pop-up window called Review Fieldsappears
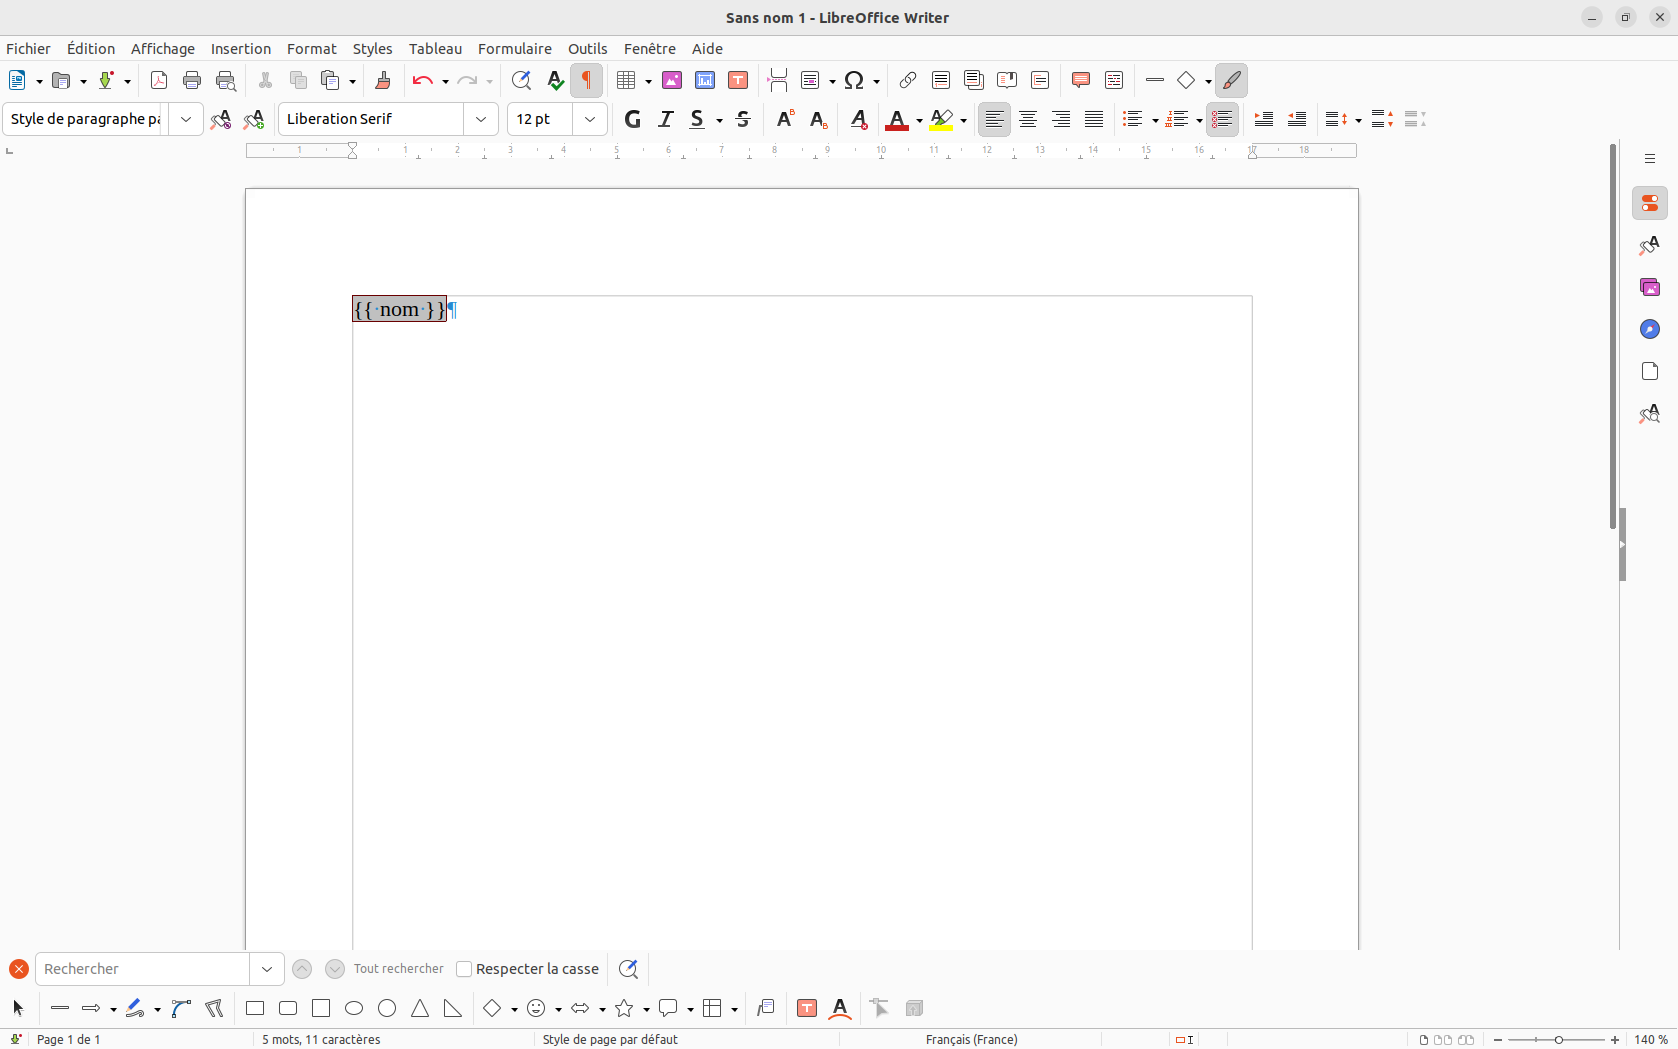
Enter {{ name }} (take care to respect the formatting of the text, and to put a space between the {{ , }} and name).
Click on 'OK' in the bottom right corner of this pop-up window.
And here you go, you have your dynamic field! It's highlighted in grey, with the double opening and closing braces.

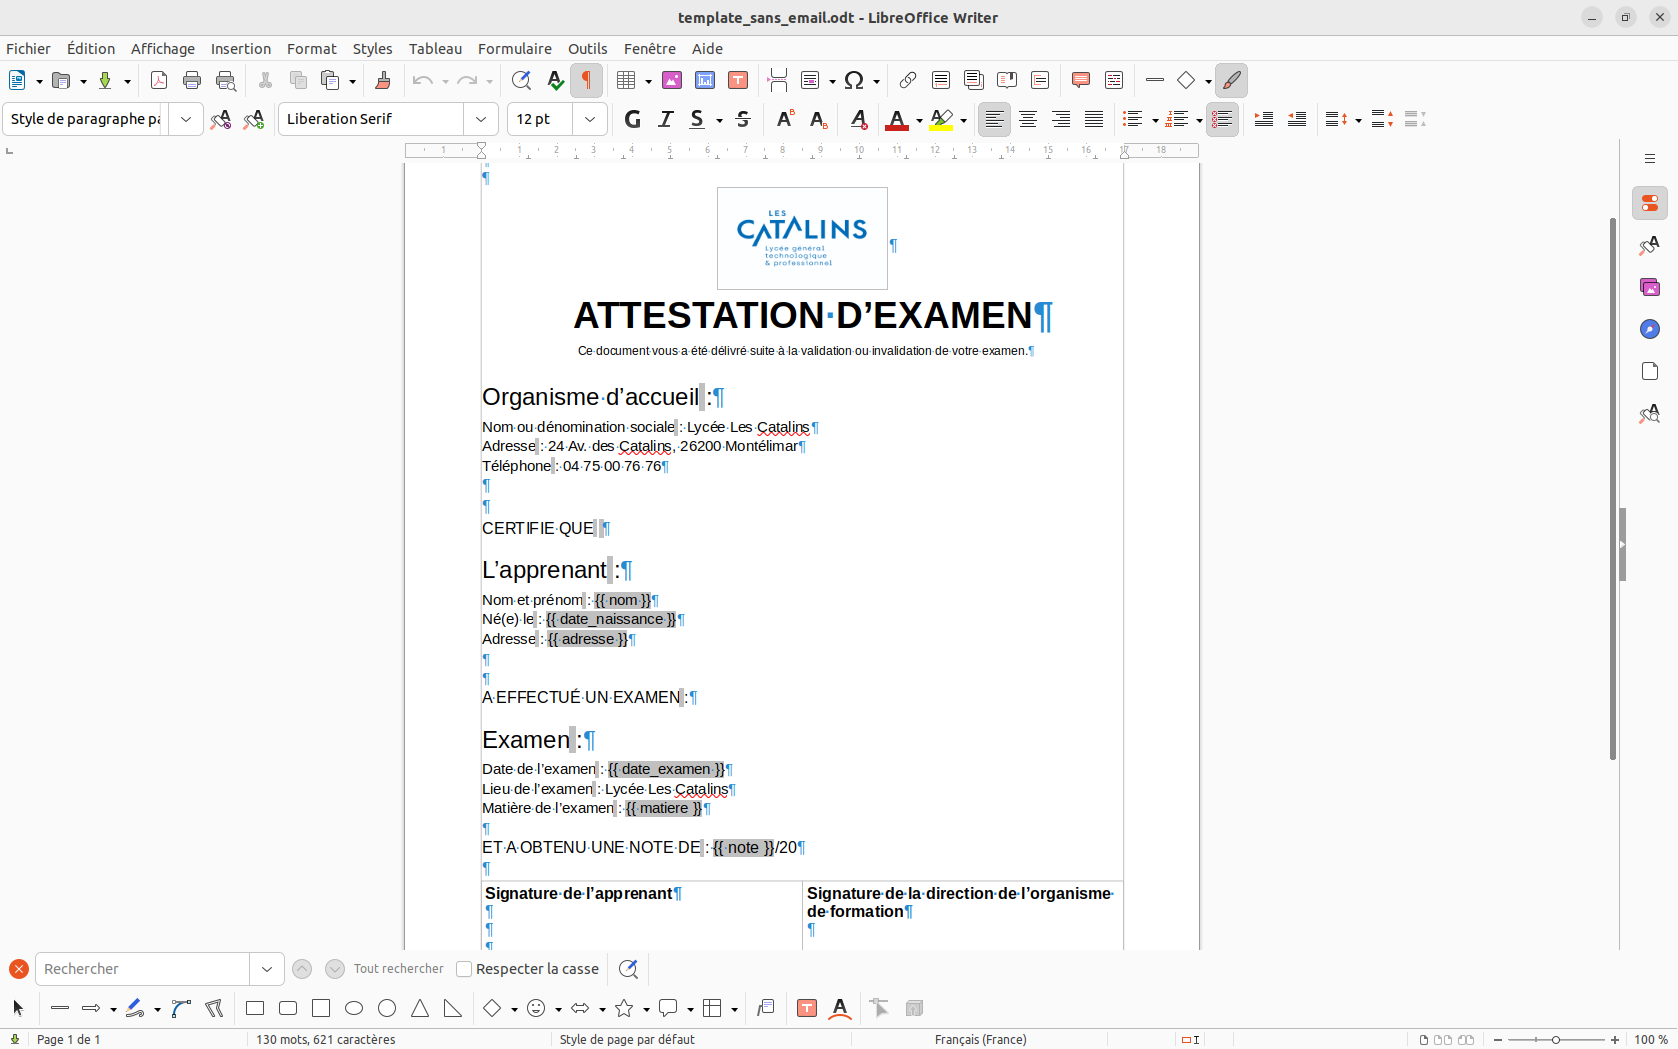
All you have to do is repeat the steps to recreate the template based on the genuine document:

We note that the fields relating to the organisation (or school) and the examination centre are not represented using dynamic fields. In fact, these fields are identical on each document created, so it is wiser to write those pieces of information in plain text format, rather than dynamic fields.
And that's how we created a template, based on a genuine document, in our use case to create examination certificates.
Why does creating templates using dynamic fields is a more practical way of creating a template than having it all in plain text format ?
Well, let's imagine that Martine fails her exam on the first try, scoring 11/20 (bearing in mind that the score must be greater than or equal to 12 out of 20 to pass)... The document will be generated, and on the day Martine passes her exam, all you have to do is upload the old exam certificate onto the platform's examination certificate's craftform, then simply change one field: Martine's new score (and change some information, such as the address if it has changed). Upmoad the new version and that's it !
Now that we have our document, we can create a corresponding mock-up checklist. Click here to find more about the making of of the mock-up checklist. It is the next necessary step to check the document's conformity.